Step 1: Gather the Necessary Materials
Before you begin cleaning your silicone straw, gather the following materials:
- Silicone straw
- Straw brush (preferably with a soft bristle)
- Mild dish soap
- Warm water
- Clean towel or dish rack for drying
Step 2: Disassemble the Straw
To clean your silicone straw thoroughly, it's important to disassemble it. Remove the straw nipple and the tube from the straw. This will allow you to reach every nook and cranny, ensuring a deep clean.
Step 3: Insert the Straw Brush
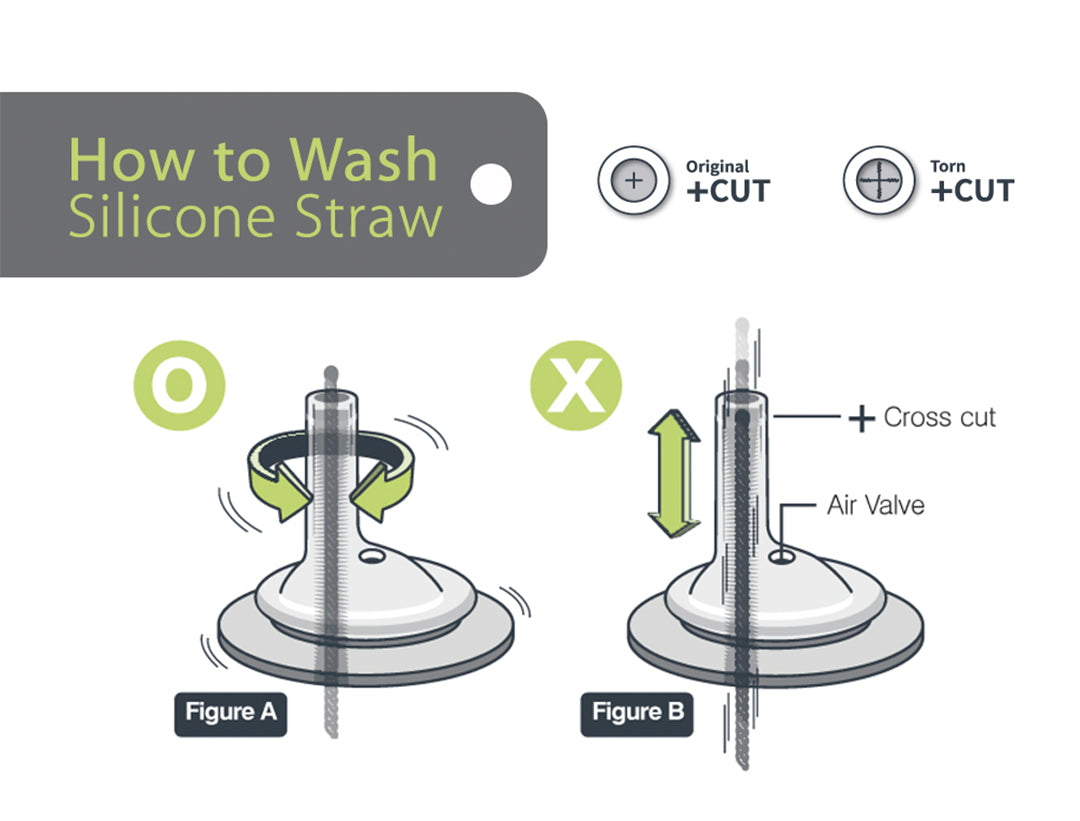
Take the straw brush and insert it into the straw nipple. Position it in such a way that the tip of the brush is visible, as shown in Figure A. This will help you effectively clean the inner walls of the straw.
Step 4: Gently Wash the Straw
With the straw brush securely in place, gently wash the silicone straw by turning the brush side to side. This motion will dislodge any residue or particles stuck inside the straw. Be sure to be gentle to avoid damaging the straw.
Step 5: Avoid Up-and-Down Motion
While cleaning, it's important to avoid using an up-and-down motion, as shown in Figure B. This motion can potentially tear the cross-cut on the straw nipple, leading to leaks. Stick to the side-to-side motion for a thorough yet safe cleaning experience.
Step 6: Rinse Thoroughly
Once you've finished brushing the straw, rinse it thoroughly under warm water. This will help remove any remaining soap residue and ensure the straw is clean and ready for use.
Step 7: Dry the Straw
After rinsing, dry the silicone straw properly before storing or using it again. You can use a clean towel to pat it dry or place it on a dish rack to air dry. Make sure it is completely dry before storing it to prevent mold or mildew growth.
Step 8: Store Properly
To maintain the cleanliness of your silicone straw, store it in a clean and dry place. You can use a storage container or a silicone straw case to keep it protected from dust and dirt.


